Description
Heat Exchanger Insulation Kits: Enhancing Efficiency and Protection for BPHEs
Heat exchanger insulation kits are essential accessories that improve the performance and lifespan of brazed plate heat exchangers (BPHEs). Used in HVAC, refrigeration, and industrial systems, these kits reduce heat loss, prevent condensation, and increase energy efficiency. Typically made from closed-cell foam, fiberglass, or polyurethane, the insulation panels or jackets wrap tightly around the exchanger. As a result, they stabilize temperature, reduce noise, and improve safety. With energy costs rising and sustainability goals becoming more critical, insulation kits are a smart addition to any BPHE system.
Insulation Kits: Purpose and Benefits
Insulation kits play a key role in maintaining thermal efficiency, especially in applications with extreme temperatures—such as district heating, refrigeration, or hot water systems. By reducing heat transfer to or from the environment, they help systems maintain optimal operating conditions. Additionally, they prevent condensation, protect the unit from environmental exposure, and enhance safety.
Construction and Materials
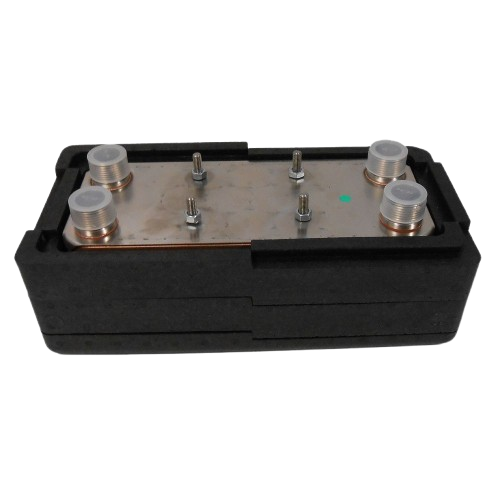
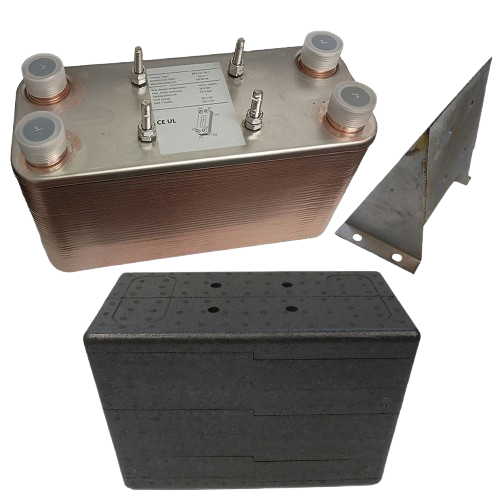
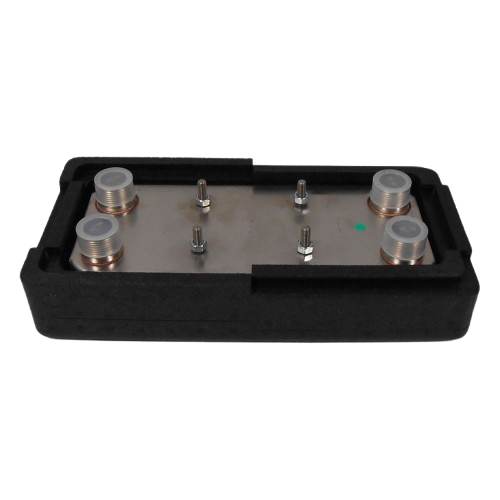
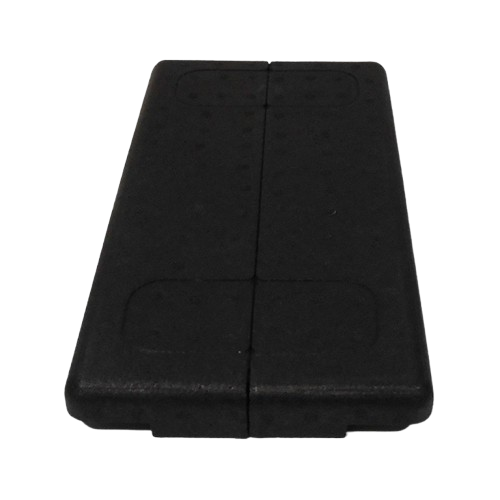
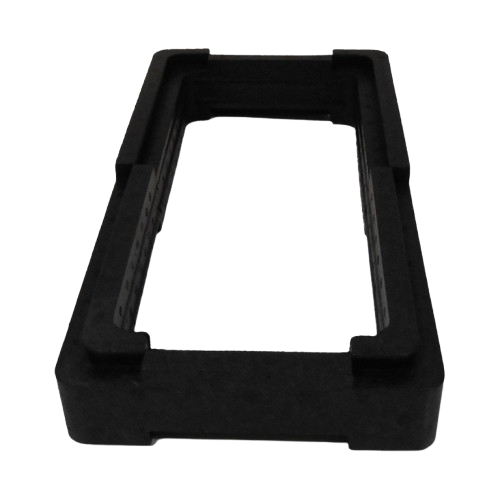
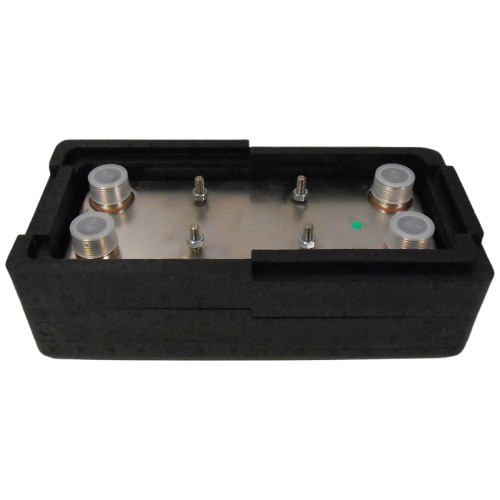
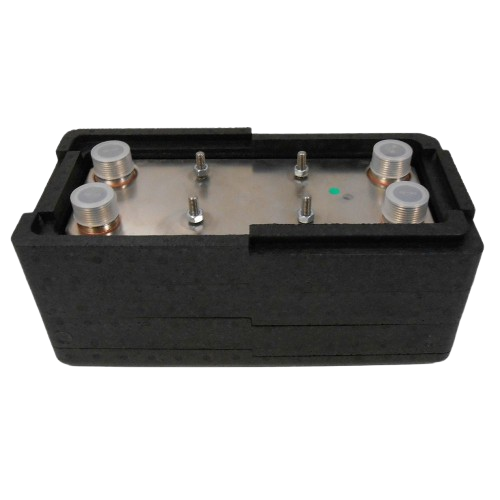
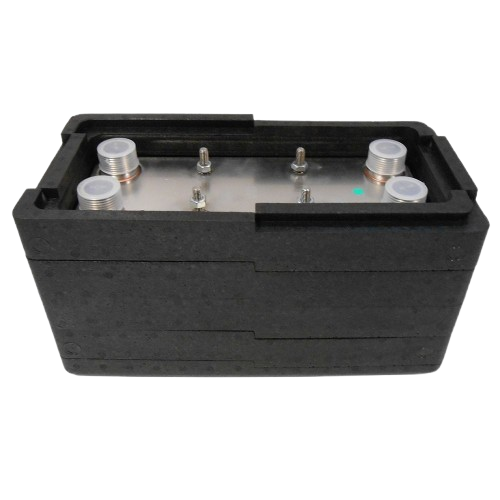
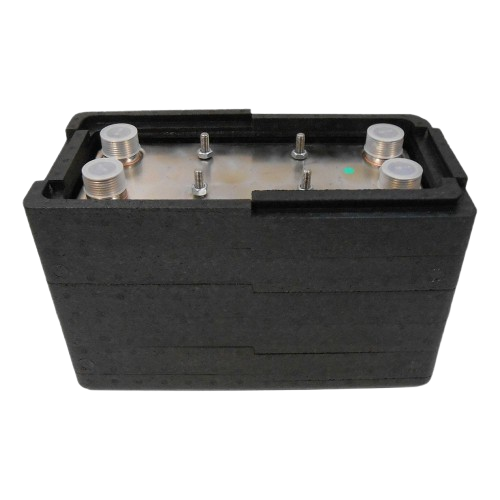
Manufacturers design insulation kits to match the dimensions of specific BPHE models. A typical kit for a 5″x12″ exchanger includes a top piece, bottom piece, and several middle panels. These pieces fit together to form a complete enclosure. The top section often features pre-cut holes for mounting studs and fluid ports, which users can trim for a snug fit.
Different applications require different materials. For example:
-
Armaflex™ foam (½ inch thick) suits refrigeration systems operating from -40°F to 220°F (-40°C to 104°C).
-
Mineral wool with aluminum cladding works well in high-temperature environments up to 350°C.
-
Polyurethane foam provides lightweight insulation in HVAC and hot water systems.
Some kits use adhesive backing for easy application, while others include mechanical fasteners for a secure hold.
Installation and Performance
Installing an insulation kit is straightforward. Users wrap the heat exchanger using the provided pieces, ensuring complete coverage. For very cold environments (below -40°F), applying two layers increases protection. A razor may be needed to trim around connection ports.
Functionally, insulation kits minimize energy losses and improve system efficiency. In cold settings, they prevent condensation and ice buildup that could degrade performance. In hot settings, they shield nearby components and workers from heat while reducing ambient heat loss.
Key Advantages
-
Improved Energy Efficiency: Minimizes thermal losses, reducing energy use and cost.
-
Condensation Prevention: Eliminates moisture buildup, especially in refrigeration systems.
-
Tailored Fit: Custom-sized kits ensure full coverage and quick installation.
Conclusion
Mounting brackets, mounting feet, insulation kits, and Y-strainers are critical accessories for brazed plate heat exchangers. Each one supports specific needs—from secure mounting and temperature stability to inlet protection and energy savings. Insulation kits, in particular, enhance thermal performance, extend equipment life, and lower operating costs. Together, these accessories ensure reliable, efficient, and long-term BPHE operation across a wide range of applications.
Also check out, “Heat Exchanger Mounting“, “
Benefits
Benefits of Heat Exchanger Insulation Kits
Heat exchanger insulation kits offer a range of advantages that enhance the performance, efficiency, and safety of brazed plate heat exchangers (BPHEs) across various applications. Here are the key benefits:
Improved Energy Efficiency: By minimizing heat loss in heating systems or heat gain in cooling systems, insulation kits can reduce energy consumption by 10–15%. This lowers operating costs and improves overall system efficiency, especially in HVAC, refrigeration, or industrial processes.
Temperature Stability: Insulation maintains consistent internal temperatures by shielding the BPHE from external fluctuations. This ensures optimal heat transfer performance and prevents inefficiencies caused by ambient conditions.
Condensation Prevention: In cold applications (e.g., chillers), insulation reduces surface temperatures below the dew point, preventing condensation buildup. This protects the exchanger and surrounding equipment from corrosion and water damage.
Personnel Safety: By limiting external surface temperatures (often keeping them below 60°C/140°F), insulation kits reduce burn risks for workers, enhancing workplace safety in high-temperature setups like boilers or heat pumps.
Extended Equipment Lifespan: Insulation mitigates thermal stress and protects against environmental factors (e.g., moisture, chemicals), reducing wear on the BPHE and prolonging its operational life.
Noise Reduction: The insulating material can dampen operational vibrations and fluid flow noise, contributing to quieter system performance.
Environmental Benefits: Lower energy use translates to a reduced carbon footprint, aligning with sustainability goals.
Tailored to specific BPHE models, insulation kits provide a cost-effective solution for optimizing performance and reliability in diverse settings.
Installation Procedures
Installation Procedures for Heat Exchanger Insulation Kits
Installing an insulation kit on a brazed plate heat exchanger (BPHE) is a straightforward process that enhances efficiency and safety. The procedure may vary slightly depending on the kit design and manufacturer (e.g., Alfa Laval, SWEP), but the following steps outline a general approach based on common practices. Always refer to the manufacturer’s manual for model-specific instructions.
Tools and Materials Needed
-
Insulation kit (panels, jacket, or pre-formed pieces)
-
Fasteners (Velcro straps, clips, or adhesive, if included)
-
Measuring tape (optional)
-
Scissors or utility knife (for trimming, if permitted)
-
Cleaning cloth and mild solvent (e.g., isopropyl alcohol)
-
Gloves and safety glasses (recommended)
Step-by-Step Installation
-
Preparation:
-
Shut down the BPHE system and ensure its depressurized, drained, and cooled to a safe temperature.
-
Clean the exchanger’s exterior with a cloth and mild solvent to remove dirt, grease, or moisture, ensuring proper adhesion or fit.
-
Inspection:
-
Unpack the insulation kit and verify all components (e.g., panels, port cutouts) match the BPHE’s dimensions and port locations.
-
Check for damage to the insulation material (e.g., tears in foam or foil).
-
Positioning:
-
Align the insulation pieces with the BPHE. Pre-formed kits typically have marked sections for the front, back, sides, and ports.
-
Ensure port openings align with the exchanger’s inlet/outlet connections to avoid obstructing piping.
-
Application:
-
Wrap or place the insulation around the BPHE. For jacket-style kits, slide or wrap the material over the exchanger like a sleeve. For panel-style kits, attach each piece individually.
-
Secure the insulation using provided fasteners—Velcro straps, clips, or adhesive backing. Press firmly to eliminate air gaps without compressing the material excessively.
-
Adjustment:
-
Check for snug coverage, ensuring no exposed areas (except ports). Trim excess material if allowed but avoid cutting critical sections like seams or port edges.
-
Verify that removable sections (if included) are accessible for future maintenance.
-
Final Checks:
-
Confirm the insulation doesn’t interfere with mounting feet, brackets, or piping connections.
-
Inspect for gaps or loose fittings and adjust as needed.
-
System Restart:
Tips and Precautions
-
Temperature: Install only when the BPHE is at ambient temperature to avoid burns or material damage.
-
Fit: Avoid overstretching or forcing the insulation, as this can reduce its thermal performance.
-
Maintenance: Ensure removable sections are correctly positioned for easy access during servicing.
-
Environment: In humid or corrosive settings, confirm the kit’s outer layer (e.g., foil) is intact to protect the insulation.
This process typically takes 15–30 minutes, depending on the BPHE size and kit complexity. Properly installed insulation enhances energy efficiency, prevents condensation, and ensures long-term performance. For detailed visuals or model-specific steps, I can search manufacturer resources if you provide a brand or model!
Only logged in customers who have purchased this product may leave a review.


Reviews
There are no reviews yet.