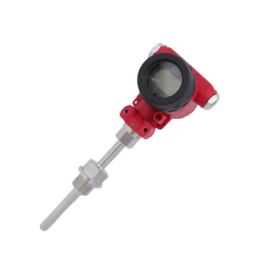
Description

Industrial Analog Thermometers are devices used to measure temperature in various industrial applications. Also, they play a crucial role in ensuring efficient and safe operations across a wide range of industries, including manufacturing, petrochemical, pharmaceutical, and food processing, among others.
Industrial Analog Thermometers come in different forms, each designed to suit specific environments and temperature ranges. Moreover, the most commonly used types include glass thermometers, bimetallic thermometers, filled system thermometers, and digital thermometers. Let’s discuss each of these in more detail.
Glass thermometers are the oldest and simplest type. Furthermore, they consist of a glass tube filled with a liquid, usually mercury or alcohol. In addition, the liquid expands or contracts with changes in temperature, causing a meniscus movement that indicates the temperature on a calibrated scale. Finally, Glass thermometers are inexpensive and widely used, but they have limitations in terms of their fragility and limited temperature range.
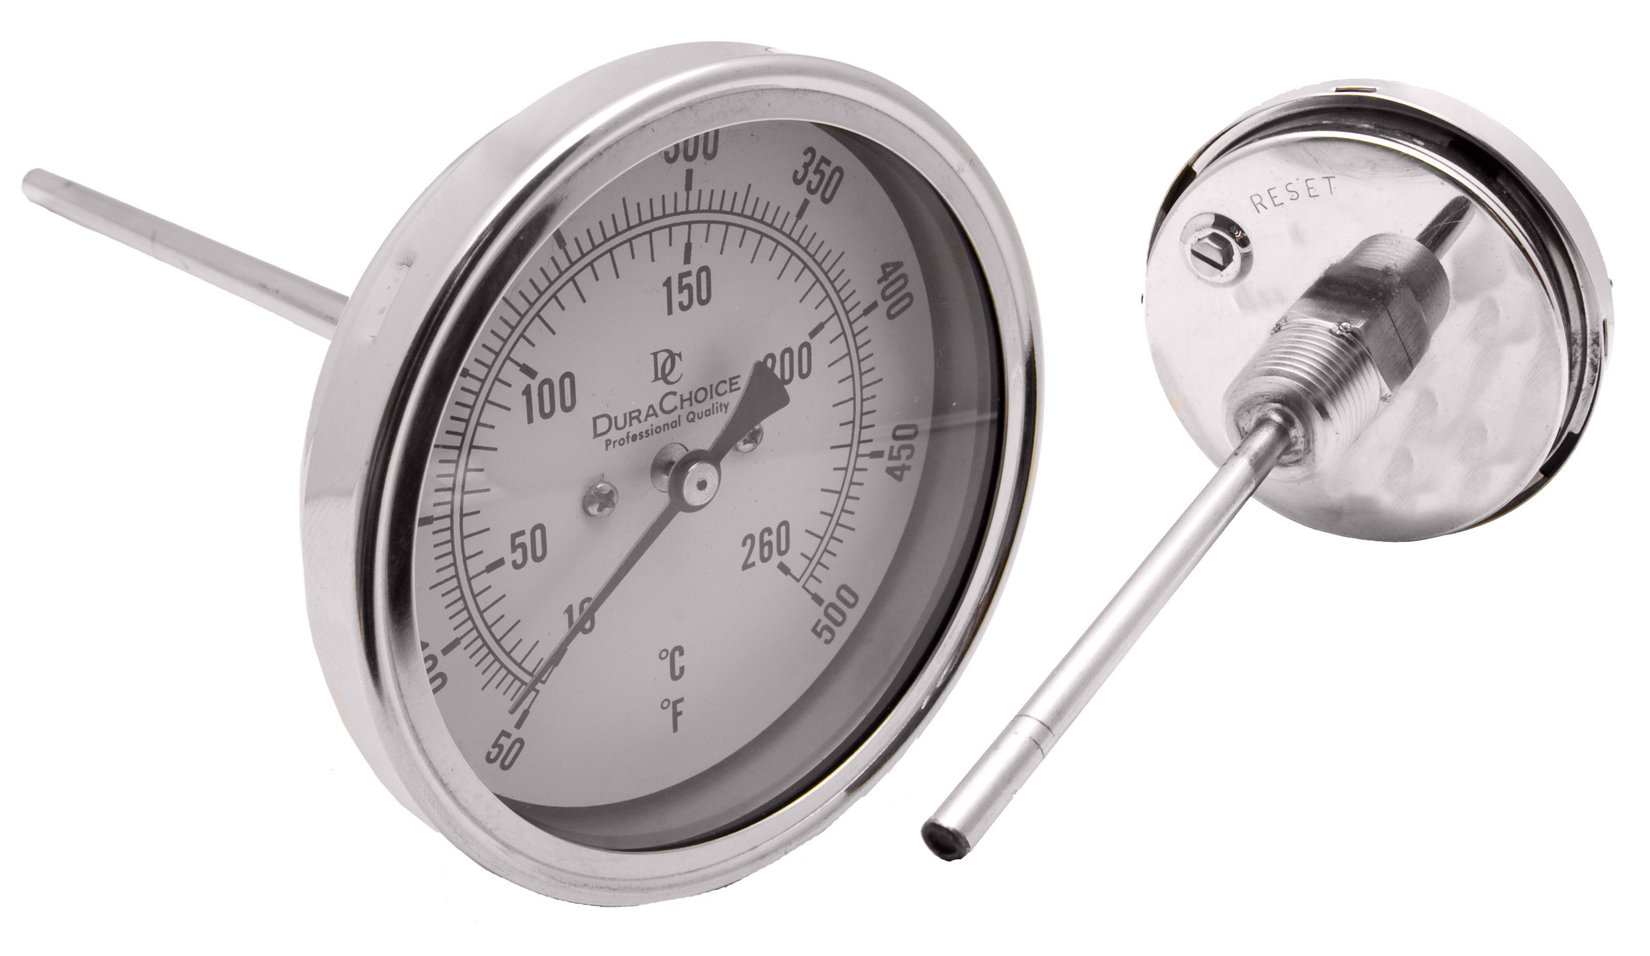
Bimetallic thermometers, on the other hand, use the principle of differential expansion of two metals to measure temperature. In addition to this, they consist of two metal strips bonded together, with different coefficients of thermal expansion. Finally, as the temperature changes, the strips bend, causing a pointer to move along a calibrated scale. Bimetallic thermometers are durable and can handle a wider temperature range than glass thermometers.
Filled system thermometers utilize a temperature-sensitive fluid, such as a gas or liquid, enclosed in a bulb or capillary tube. As the temperature changes, the fluid expands or contracts, causing a corresponding movement of a pointer or display. Filled system thermometers offer greater accuracy, flexibility, and reliability over a wide temperature range.
Different Types
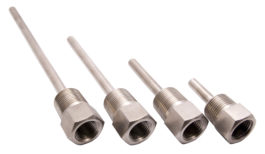
In addition to the different types, Industrial Analog thermometers also vary in terms of their mounting and connection options. Some can be mounted directly onto an industrial process or equipment, while others require a thermowell, a protective housing that allows temperature measurement without direct contact with the medium. Apart from this, thermowells come in various designs to accommodate different process conditions, such as pressure, flow, and corrosive environments.
To ensure accurate measurements, industrial thermometers undergo calibration and periodic recalibration. Calibration involves comparing the thermometer’s readings against a known reference under controlled conditions. Recalibration is necessary to account for any shifts or drifts in the thermometer’s accuracy over time.
Essential
In conclusion, industrial thermometers are essential tools for monitoring temperature in various industrial settings. They provide critical information for maintaining process control, optimizing efficiency, and ensuring the safety of personnel and equipment.
Analog industrial thermometers, such as glass thermometers and bimetallic thermometers, have been widely used for temperature measurement in industries. They come with certain advantages and disadvantages that are worth considering. Let’s explore them:
Other Specifications
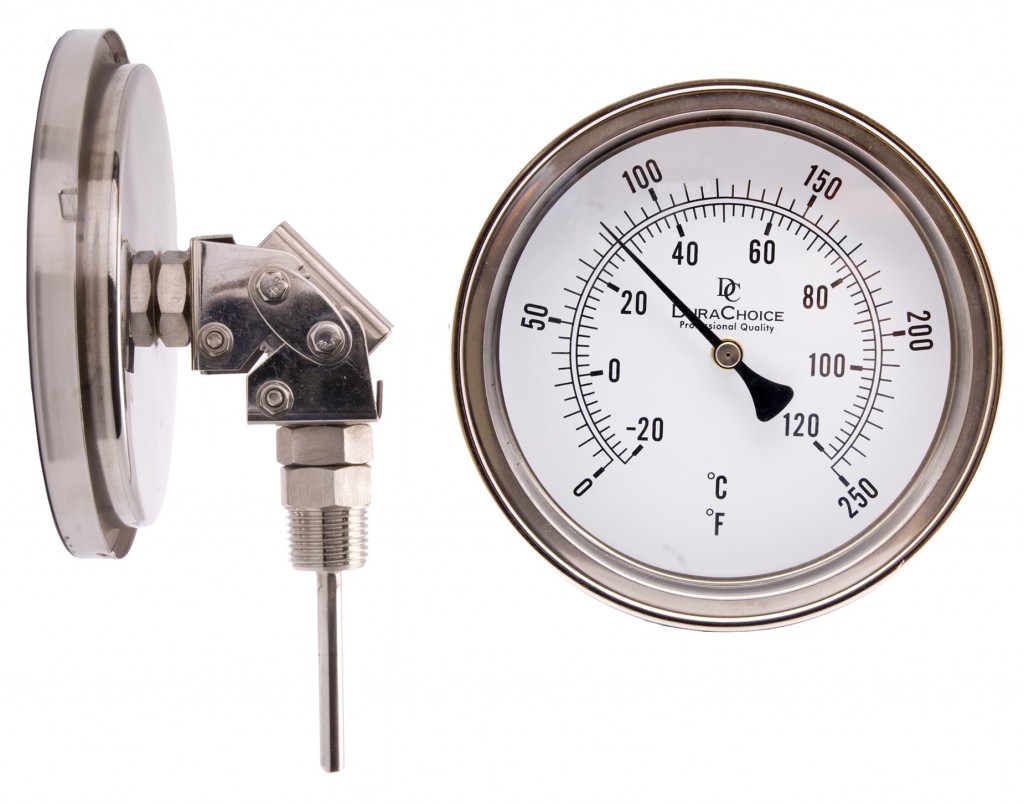
These Industrial thermometers have an adjustable angle connection that makes them ideal for placement in hard-to-reach locations.
A large 5″ face makes them more readable from a distance. The calibration dial on the back of the thermometer makes sure you get an accurate reading.
Calibration of Industrial Thermometers
Thermometers can be calibrated either by comparing them with other calibrated thermometers. You can also check them against known fixed points on the temperature scale.
The best-known of these fixed points are the melting and boiling points of pure water. (Note that the boiling point of water varies with pressure, so this must be controlled.)
The traditional way of putting a scale on a liquid-in-glass or liquid-in-metal thermometer was in three stages:
- Immerse the sensing portion in a stirred mixture of pure ice and water at atmospheric pressure. After, mark the point indicated when it had come to thermal equilibrium.
- Immerse the sensing portion in a steam bath at Standard atmospheric pressure and again mark the point indicated.
- Divide the distance between these marks into equal portions according to the temperature scale being used.
Other fixed points used in the past are the body temperature (of a healthy adult male) which was originally used by Fahrenheit as his upper fixed point (96 °F (36 °C) to be a number divisible by 12) and the lowest temperature given by a mixture of salt and ice, which was originally the definition of 0 °F (−18 °C). (This is an example of a Frigorific mixture). As body temperature varies, the Fahrenheit scale was later changed. Finally, It was changed to use an upper fixed point of boiling water at 212 °F (100 °C).
History of Industrial Thermometers
These have now been replaced by the defining points in the International Temperature Scale of 1990, though in practice the melting point of water is more commonly used than its triple point, the latter being more difficult to manage and thus restricted to critical standard measurement. Nowadays manufacturers will often use a thermostat bath or solid block where the temperature is held constant relative to a calibrated thermometer.
Other thermometers to be calibrated are put into the same bath or block and allowed to come to equilibrium, then the scale is marked, or any deviation from the instrument scale is recorded. For many modern devices, calibration will be stating some value to be used in processing an electronic signal to convert it to a temperature.
Precision, accuracy, and reproducibility
The precision or resolution of a thermometer is simply to what fraction of a degree it is possible to make a reading. For high-temperature work, it may only be possible to measure to the nearest 10 °C or more. Clinical thermometers and many electronic thermometers are usually readable to 0.1 °C.
Special instruments can give readings to one-thousandth of a degree. However, this precision does not mean the reading is true or accurate, it only means that very small changes can be observed.
A thermometer calibrated to a known fixed point is accurate (i.e. gives a true reading) at that point. Most thermometers are originally calibrated to a constant-volume gas thermometer. In between fixed calibration points, interpolation is used, usually linear.
Significant Differences Between Industrial Thermometers
This may give significant differences between different types of thermometers at points far away from the fixed points. For example, the expansion of mercury in a glass thermometer is slightly different from the change in resistance of a platinum resistance thermometer, so these two will disagree slightly at around 50 °C. There may be other causes due to imperfections in the instrument, e.g. in a liquid-in-glass thermometer if the capillary tube varies in diameter.
For many purposes reproducibility is important. That is, the same Industrial thermometers give the same reading for the same temperature. Reproducible temperature measurement means that comparisons are valid in scientific experiments and industrial processes are consistent. Thus, if the same type of Industrial thermometer is calibrated in the same way its readings will be valid. It will remain valid even if it is slightly inaccurate compared to the absolute scale.
An example of a reference Industrial thermometer used to check others to industrial standards would be a platinum resistance thermometer with a digital display to 0.1 °C (its precision) which has been calibrated at 5 points against national standards (−18, 0, 40, 70, 100 °C) and which is certified to an accuracy of ±0.2 °C.
According to British Standards, correctly calibrated, used, and maintained liquid-in-glass Industrial Analog Thermometers can achieve a measurement uncertainty of ±0.01 °C in the range of 0 to 100 °C, and a larger uncertainty outside this range: ±0.05 °C up to 200 or down to −40 °C, ±0.2 °C up to 450 or down to −80 °C.
If this does not meet your application requirements pls contact SRS or choose another product below
Temperature Sensors
Thermowells
Maintenance
Regular maintenance of a temperature analog gauge ensures accurate readings and extends the lifespan of the gauge. Follow these steps to maintain your gauge properly:
Tools and Materials Needed:
- Multimeter
- Cleaning cloths
- Isopropyl alcohol or a suitable electronic cleaner
- Screwdriver set
- Wrench set
- Replacement parts (if needed)
- User manual for the specific gauge
Step-by-Step Instructions:
- Safety Precautions:
- Ensure the system is turned off and disconnected from the power supply before performing any maintenance.
- Wear appropriate personal protective equipment (PPE), such as gloves and safety glasses.
- Visual Inspection:
- Inspect the gauge and its components for any signs of damage, corrosion, or wear.
- Check the mounting hardware to ensure the gauge is securely attached and not loose.
- Clean the Gauge:
- Use a clean, dry cloth to wipe the exterior of the gauge.
- If necessary, use a cloth dampened with isopropyl alcohol or an appropriate electronic cleaner to remove dirt and grime.
- Avoid using harsh chemicals or abrasive materials that could damage the gauge’s surface.
- Check Connections:
- Inspect all connections for tightness and signs of corrosion.
- Use a screwdriver or wrench to tighten any loose connections.
- If any connections are corroded, disconnect them, clean the contacts with isopropyl alcohol, and reattach them securely.
- Test the Sensor:
- Use a multimeter to test the sensor’s resistance or voltage, depending on the type of sensor used (e.g., thermocouple, RTD).
- Compare the readings to the specifications provided in the user manual to ensure the sensor is functioning correctly.
- If the sensor is faulty, replace it with a new one following the manufacturer’s instructions.
- Calibrate the Gauge:
- Some temperature analog gauges may require periodic calibration to maintain accuracy.
- Refer to the user manual for calibration procedures specific to your gauge model.
- Use a known reference temperature source to verify and adjust the gauge’s readings if necessary.
- Functional Test:
- Observe the gauge to ensure it displays accurate and stable temperature readings.
- Monitor the gauge for any irregularities or fluctuations.
- Documentation:
- Keep a maintenance log detailing the date, observations, actions taken, and any parts replaced.
- Regularly review the log to identify any recurring issues that may need further attention.
Additional Tips:
- Schedule regular maintenance intervals based on the operating conditions and manufacturer’s recommendations.
- If the gauge is used in a harsh environment, more frequent maintenance may be necessary.
- Always refer to the specific gauge and sensor manufacturer’s instructions for detailed maintenance procedures.
- If you encounter issues that cannot be resolved through regular maintenance, consult a professional technician for further assistance.
By following these maintenance procedures, you can ensure that your temperature analog gauge remains accurate and reliable over time.
Q&A
Q: What is an industrial analog thermometer used for?
A: Industrial analog thermometers are used to measure temperature in various industrial settings to monitor processes and ensure optimal conditions for equipment and materials.
Q: How accurate are industrial analog thermometers?
A: The accuracy of industrial analog thermometers can vary depending on the quality and calibration of the specific thermometer. Generally, they are designed to provide reasonably accurate temperature readings within a certain range.
Q: What are some common types of industrial analog thermometers?
A: Common types of industrial analog thermometers include bi-metal thermometers, gas-actuated thermometers, expansion thermometers, and vapor-pressure thermometers, each designed for specific industrial applications.
Q: How do you calibrate an industrial analog thermometer?
A: Calibration methods for industrial analog thermometers typically involve comparing the readings of the thermometer against a known standard or reference thermometer and adjusting as needed to ensure accurate temperature measurement.
Q: What are the benefits of using industrial analog thermometers over digital thermometers?
A: Industrial analog thermometers are often preferred in industrial settings for their simplicity, durability, and reliability, especially in environments with high temperatures, humidity, or potential electrical interference.
Advantages / Disadvantages
Advantages of Analog Industrial Thermometers
Cost-effective
Analog thermometers are generally less expensive compared to digital thermometers, making them a cost-effective choice for temperature measurement in many industrial applications.
Simple and easy to use
Analog thermometers are relatively straightforward and user-friendly. They typically have a clear display with a needle or scale that directly indicates the temperature readings, requiring no special training or technical knowledge.
Instantaneous readings
Analog thermometers provide real-time, instantaneous temperature readings. There is no need to wait for digital displays to stabilize or for sensors to warm up. This makes analog thermometers convenient for quick temperature checks or on-the-spot measurements.
Reliability
Analog thermometers are known for their durability and reliability. They are less prone to electronic malfunctions or battery failures that may occur in digital thermometers. As long as they are handled with care and calibrated regularly, analog thermometers can provide accurate and consistent readings for extended periods.
Disadvantages of Industrial Analog thermometers
Limited accuracy
Analog thermometers may have limitations in terms of their accuracy compared to digital thermometers. The readability of the scale and precision of the markings can affect the accuracy of temperature readings. This can be a concern in applications where highly precise temperature control is required.
Limited temperature range
Different types of analog thermometers have specific temperature ranges within which they can operate effectively. For example, glass thermometers may not be suitable for very high or low-temperature measurements due to the limitations of the glass material or the filling liquid. Bimetallic thermometers also have temperature limitations based on the chosen metal alloys.
Fragility
Analog thermometers, especially glass thermometers, are relatively fragile and susceptible to breakage if mishandled or exposed to mechanical stress. The breaking of a glass thermometer can lead to safety hazards, such as the release of mercury or other hazardous liquids. Special care must be taken when using, transporting, and disposing of glass thermometers to minimize the risk of accidents.
Reduced functionality
Analog thermometers typically provide only temperature readings without additional features or data storage capabilities. Also, they lack the advanced functionality of digital thermometers, such as data logging, alarm systems, remote monitoring, and integration with control systems. Depending on the specific requirements of an industrial process, these limitations might be a disadvantage.
It’s important to weigh these advantages and disadvantages when deciding on the most suitable type of thermometer for a particular industrial application. Additionally, while analog thermometers have their benefits in terms of cost, simplicity, and reliability, it may be worth considering digital thermometers for more demanding applications that require higher accuracy, wider temperature range, and additional functionalities.
Industries Served
Industries Served
Industries use industrial thermometers in various applications for temperature measurement and control. Some of the key industries that rely on industrial thermometers include:
Manufacturing
In manufacturing processes, industrial thermometers are used to monitor temperatures in equipment like furnaces, ovens, and kilns. Also, they help ensure optimal temperatures for processes such as metal smelting, glass manufacturing, and ceramic production.
Petrochemical
The petrochemical industry utilizes industrial thermometers to monitor temperature in refineries, chemical reactors, and distillation columns. Furthermore, accurate temperature control is crucial for efficient production, safety, and the prevention of costly equipment failures.
Food and Beverage
Industrial thermometers play a vital role in food processing and beverage production. They are used to monitor and control temperatures in ovens, cooking vessels, refrigeration units, and pasteurization processes. Ensuring proper temperatures is critical for food safety and quality compliance.
Pharmaceuticals
In the pharmaceutical industry, industrial thermometers are essential in the production of drugs and vaccines. Moreover, they are used to monitor temperatures in sterilization and fermentation processes, lyophilization (freeze-drying), and storage facilities. Precise temperature control is crucial to maintain product efficacy and stability.
HVAC and Refrigeration
Industrial thermometers are employed in heating, ventilation, air conditioning, and refrigeration systems for temperature monitoring and control. Also, they are used in HVAC units, chillers, boilers, and cooling towers to maintain optimal temperatures and ensure energy efficiency.
Power Generation
Industrial thermometers are used in power plants to monitor temperatures in steam boilers, turbines, and cooling systems. Accurate temperature control is essential for safe and efficient energy production.
Automotive
In the automotive industry, industrial thermometers are utilized in manufacturing processes like welding, metal forming, and engine assembly. Additionally, they help maintain optimal temperatures during these processes to ensure quality and prevent damage to components.
Aerospace
Industrial thermometers are used in aerospace manufacturing and maintenance to measure and monitor temperatures in various processes, including composite curing, heat treatments, and engine testing. Without a doubt, temperature control is crucial in ensuring the integrity and safety of aircraft components.
Chemical
Industrial thermometers are crucial in chemical processes and reactors where temperature plays a critical role in reactions and product quality. Besides, they help maintain temperatures within specific ranges to optimize reaction rates, yield, and product consistency.
Environmental Monitoring
Industrial thermometers are used in environmental monitoring systems to measure and record temperatures in various settings, such as weather stations, climate-controlled storage facilities, and greenhouse environments.
These are just a few examples of the many industries that rely on industrial thermometers for accurate temperature measurement and control. Additionally, the specific requirements and temperature ranges vary across different industries, necessitating the use of different types of industrial thermometers.


